Thursday, September 24, 2009

Sorting and filtering databound listview in WPF

This is actually quite a simple thing, but a lot of people don't know it, so I'll explain how it's done. As you know, the concept of databinding in WPF is that you provide the visual elements with their data source and they know what to do with it. For example, give a collection of items to a listview, and the listview will generate its items automatically, without forcing you to get involved with the items' visuals, like back at the days of Windows Forms you had to individually create all ListViewItem elements, and so on. On the other hand, that was more direct approach - you know you have some list view items, and when you want to sort them, you just apply sorting to the collection of visual elements. But in WPF you don't have a direct access to the visual elements (ListViewItem). One way to sort a list view would be to modify the source collection. But it's a bit messy, sometimes the collection is read-only, and sometimes we don't want to change the source data.
So WPF offers a way to deal with this with the so called "View" object. It provides functionality to sort, filter, and group items in listviews or other controls that display a collection of items.

Filtering a ListView

Applying a filter to a listview is pretty simple. First, we need to get the view object from the listview, and then provide a predicate that should tell if an item will be included in the filtered view or not.


// Get the default view from the listview
ICollectionView view = CollectionViewSource.GetDefaultView(lstMovies.ItemsSource);

view.Filter = null;
view.Filter = new Predicate<object>(FilterMovieItem);

And now we define the predicate:


private bool FilterMovieItem(object obj)
{
MovieItem item = obj as MovieItem;
if (item == null) return false;

string textFilter = txtFilter.Text;

if (textFilter.Trim().Length == 0) return true; // the filter is empty - pass all items

// apply the filter
if (item.MovieName.ToLower().Contains(textFilter.ToLower())) return true;
return false;
}

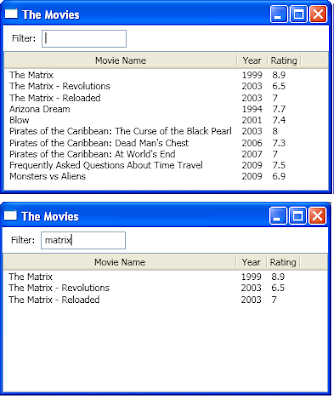
The result is: we now have a working filter for our listview:


Sortinga ListView

The sorting is done in almost the same way. Again we get the view object and then apply some sort descriptions. We don't have to come up with some complicated sorting algorithm, it's enough to provide the property name of the data item by which the listview will be sorted, and the sort direction.


// .....

// Get the default view from the listview
ICollectionView view = CollectionViewSource.GetDefaultView(lstMovies.ItemsSource);

// .....
// .....

view.SortDescriptions.Clear();
view.SortDescriptions.Add(new SortDescription(propertyName, direction));

And now we have a support for sorting the items in the listview:


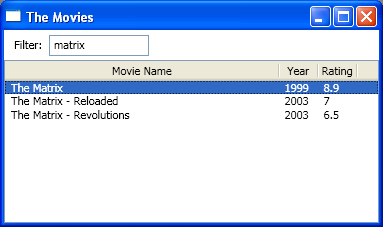
Of course, sorting and filtering can be applied at the same time, like in this case we have filtered movies which have names containing "matrix" and sorted them by rating:


Download sample application

The sample can be downloaded here: Download sample

Sunday, September 13, 2009

WPF Circle Launcher User Control and Application

Recently I started developing an user control for WPF which could replace the standard menu systems. The user control is a set of icons, ordered in a circle (or several circles, if there are a lot of icons), and each icon launches some functionality. The user control is customizable, there are parameters for the size of the icons, the radius of the circle, events for clicking and moving, etc.

Then I decided to create a simple application launcher using this control. It's something like a quick-launch menu - users can add shortcuts to applications they use frequently and then start them from there.

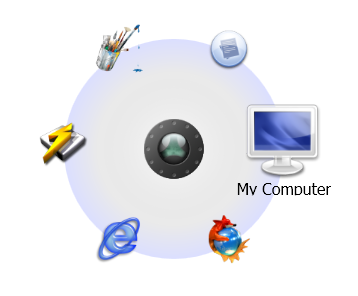
Here are some screenshots of the Circle Launcher:


The user control creates animations when the user passes over an icon with the mouse:


It supports transparency and the windows is at the top-level, so it's convenient to use. Also, when the icons become too much for just one circle, the control automatically expands itself.


The application is under development, but still, I decided to post a preliminary version here.
The current features include:
  • Adding new icons with drag and drop
  • Automatic saving of the icons to XML and then loading back on startup
  • Hotkey for showing the launcher - F12
  • Moving the launcher across the screen (by dragging the center circle) and saving it's position
  • Auto-hide when a shortcut is launched
  • Manual hide by double-clicking the center or using the context menu of the system tray icon
The features of the user control include:
  • Adding and removing shortcuts (Launcher Items)
  • Explicitly setting the properties of a shortcut - Name, Icon, Launch path, etc.
  • Events for launching, moving, double-click, etc.
  • Settings for the circle radius, max number of items in each radius, icon sizes
  • Animations
  • Built-in drag-drop support for shortcuts
  • Support for databinding
If anyone is interested in helping me to extend this application or the user control, please contact me. Even only with ideas. Any kind of help will be appreciated.

Download Circle Launcher

You can download the application from here. You'll need .NET 3.5 to run it.

Saturday, September 12, 2009

User Control Inheritance in WPF

User control inheritance is very useful in a lot of cases. But it seems like WPF doesn't want us to do that. Have you tried to create a user control (defined with XAML and code-behind) , and then inherit it? The compiler gets very mad at us and says there is an error:

'SomeBaseControl' cannot be the root of a XAML file because it was defined using XAML

Now, what can we do to avoid this unpleasant message?

Variant 1,
Use a custom control for the base class (defined only with code, not XAML)

This is handy sometimes. What you do is create the base control as a custom control, using just the code


public class TestBaseCtrl : Control
{
// Add some base logic here...
}


You can add your controls from the code and create the base logic. Then you can inherit that control even in XAML, like this.


This is a working solution, but it's not very convenient. You don't have the flexibility of XAML in the base control. So let's take a look at the other solution.

Variant 2,
Create the base control using XAML

OK, but how on earth do we do that? We all saw the error message - we cannot define a base control in XAML and then inherit it again in XAML, according to the compiler. However, there is an easy way to trick the compiler to allow us to do that.
The main idea is to create a base control as a custom control again, and then define a control template in XAML. It's basically the same as defining the base control with XAML. Here is what I mean. This is the code-behind for the control:


public class TestBaseCtrl : UserControl
{
public static RoutedCommand TestButton1 = new RoutedCommand();
public static RoutedCommand TestButton2 = new RoutedCommand();

static TestBaseCtrl()
{
DefaultStyleKeyProperty.OverrideMetadata(typeof(TestBaseCtrl), new FrameworkPropertyMetadata(typeof(TestBaseCtrl)));
}

public TestBaseCtrl()
{
this.CommandBindings.Add(new CommandBinding(TestButton1, TestButton1_Executed));
this.CommandBindings.Add(new CommandBinding(TestButton2, TestButton2_Executed));
}

private void TestButton1_Executed(object sender, ExecutedRoutedEventArgs e)
{
MessageBox.Show("This is button 1 from the base control");
}

private void TestButton2_Executed(object sender, ExecutedRoutedEventArgs e)
{
MessageBox.Show("This is button 2 from the base control");
}
}


And this is the control template, defined in XAML:


You can see that we have specified an area of the base control, in which the content of the child controls would be displayed, using ContentPresenter.
Now, let's inherit that control:


Now, the WPF compiler is totally OK with it, and even displays the inherited control in the designer:

And there you go - now you have a base control and an inherited control which both use the power of XAML. Everything goes well in the compilation and the compiler is no longer mad at us:

========== Build: 1 succeeded or up-to-date, 0 failed, 0 skipped ==========

Download sample application

The sample can be downloaded here: Download sample